Installation
Ouster Studio is cross-platform, with official support for Windows, MacOS and Ubuntu.
Please select and download the installation file based on the operating system. Ouster Studio is built to auto update to the latest releases to support users with new features and bug fixes from previous versions.
Users can opt out of auto updates by simply following steps shown in the figure below.
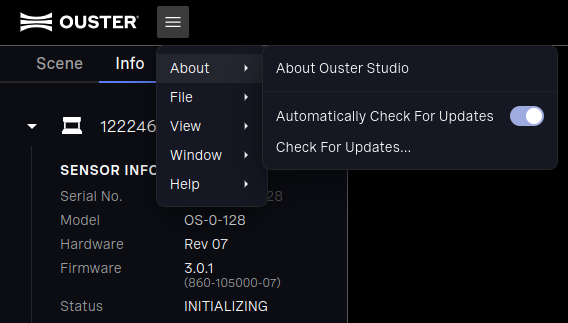
Fig. 2 Disable auto-update
Please refer to Minimum Hardware Requirements and Compatible Operating Systems before installing to avoid any failures or troubleshooting.
Linux
Please visit Ouster Downloads page to download the latest version of the software for Linux/Ubuntu System.

Fig. 3 Ouster Studio image
Once Downloaded:
Please make sure the file is available in your Downloads folder as
OusterStudio-x.x.AppImageOpen terminal (
Ctlr + Alt + t) and change directory from home to Downloads, and run the following command:chmod u+x OusterStudio-x.x.AppImage
Now, open file
directory > Downloads > double click on OusterStudio-x.x.AppImage, once read and understood click Agree on Ouster Studio agreement.
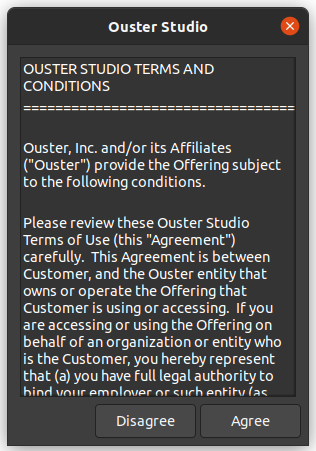
Fig. 4 Ouster Agreement
Ouster Studio is now ready for use. Please refer to Visualize and Replay Data for more information.
Note
User must verify the network settings on host machine are set to Link-Local Only mode for the sensor to be visible by Ouster Studio. Please refer to Linux - Networking Guide for more information.
Windows
Please visit Ouster Downloads page to download the latest version of the software for Windows System.
Once Downloaded:
Open file explorer, in
This PCnavigate to Downloads and double click onOuster Studio Setup.Ouster Studio will be installed. Please read through the license agreement and click
I agreeto continue.
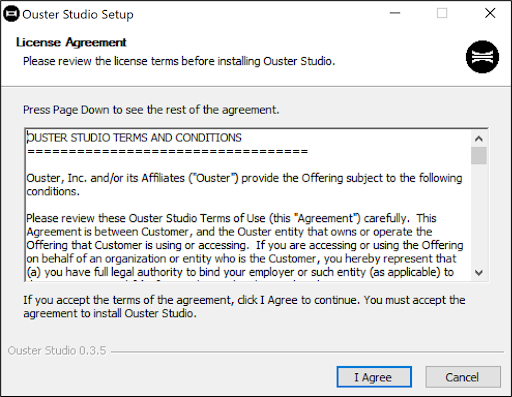
Fig. 5 Click I Agree
Based on the type of firewall installed on the computer, you may see a pop up like shown in the figure below, please click
Allow accessfor Ouster Studio. If you have any questions, reach out to Ouster Support.
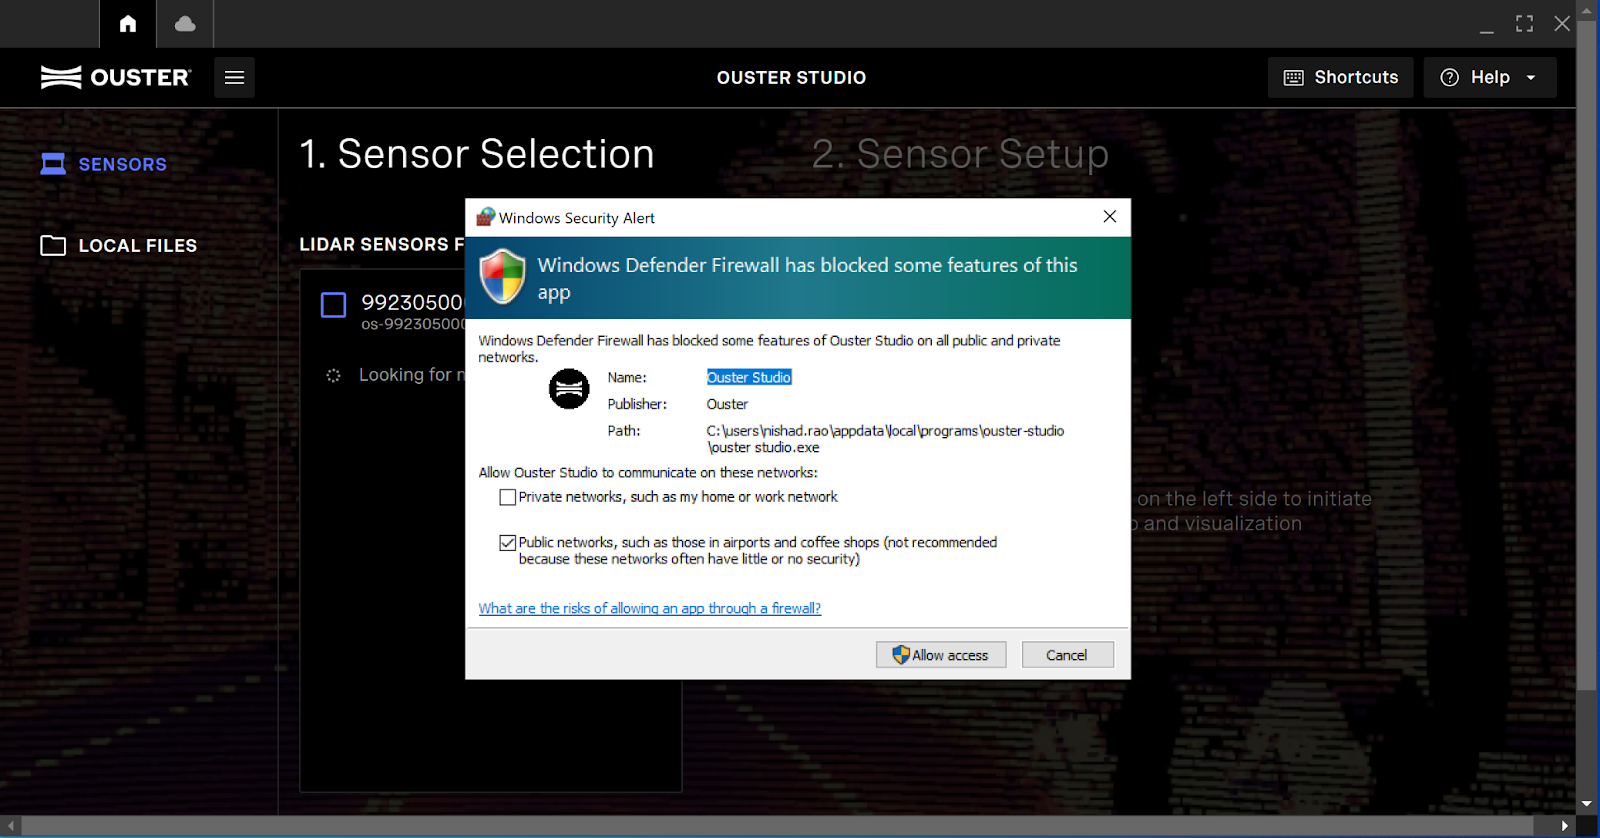
Fig. 6 Windows Defender/Firewall
Ouster Studio is now ready for use. Please refer to Visualize and Replay Data for more information.
MacOS
Please visit Ouster Downloads page to download the latest version of the software for MacOS.
Once Downloaded:
Double click on the
.dmgfile and install the software. User will be prompted with the agreement from Ouster Studio, please read carefully and clickAgree.User will then be prompted to drag and drop Ouster Studio in the
Applicationsfolder, please refer to pictures below for reference.
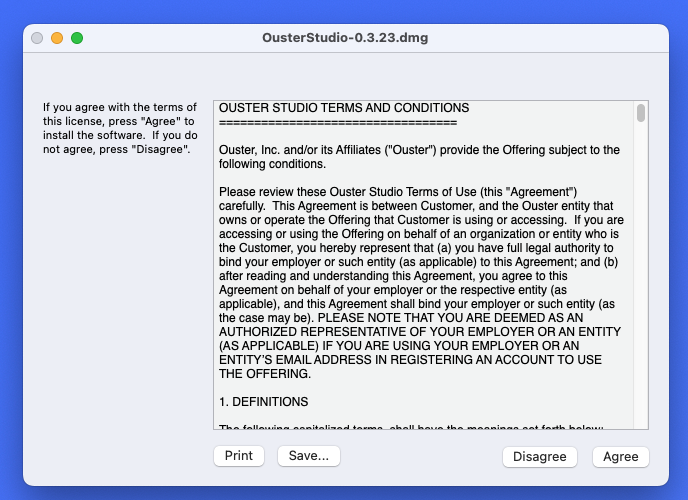
Fig. 7 Agreement - MacOS Click |
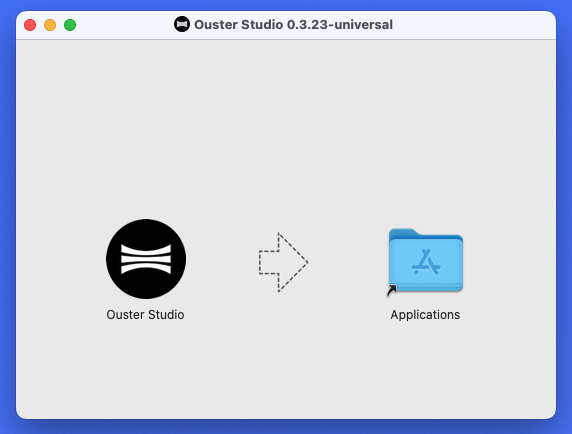
Fig. 8 |
Open
Applicationsfolder and find/search Ouster Studio, double click to open the application.User may or may not see this pop up alert but if you do please click
opento begin application.
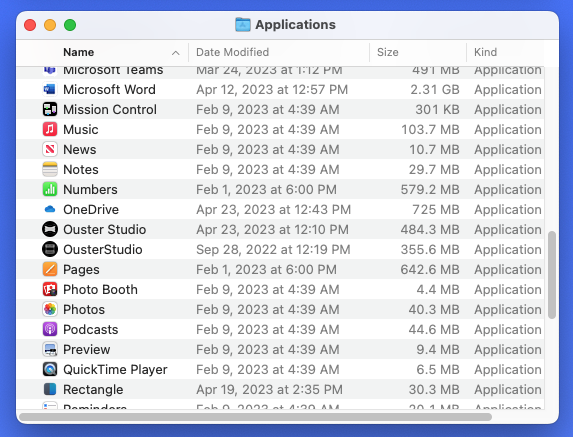
Fig. 9 |
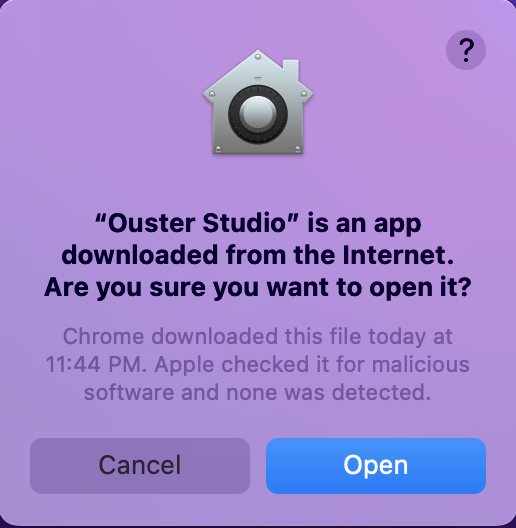
Fig. 10 Mac OS Verification |
Ouster Studio is now ready for use. Please refer to Visualize and Replay Data for more information.