Filter Point clouds values in Ouster-CLI
Filter Command
The filter command offers a rich set of filter options that can be used to suppress or replace the measurements
values of selected fields based on a certain predicate. Pixels values that match the predicate will be replaced by
the value of the option --invalid-value (default is zero) .
The current syntax:
ouster-cli source SOURCE filter [OPTIONS] AXIS_FIELD INDICES
Where:
SOURCEcan be a sensor hostname or a PCAP file.AXIS_FIELDcan be either a field name such asRANGE,REFLECTIVITYor a axis in the cartesian coordinates{X, Y, Z}or image coordinates{U, V}.INDICESThe indices specifiy a range of values (e.g.,0:10) that map to the values of theAXIS_FIELD. Any value of the choosenAXIS_FIELDthat matches theINDICESwill be replaced by zero unless the option--invalid-valueis set to a different value.[OPTIONS]current options include:--invalid-value: The value to replace the pixels that match the predicate. Default is zero.--filtered-fields: A comma-separated list of fields to apply the filter to. If not specified, the filter will be applied to all fields of the scan.--coord-frame: Coordinate frame for XYZ filtering only. Options areSENSOR(no extrinsics),BODY(extrinsics, default), andWORLD(dewarp with poses).
Example Usage
Filter based on field values:
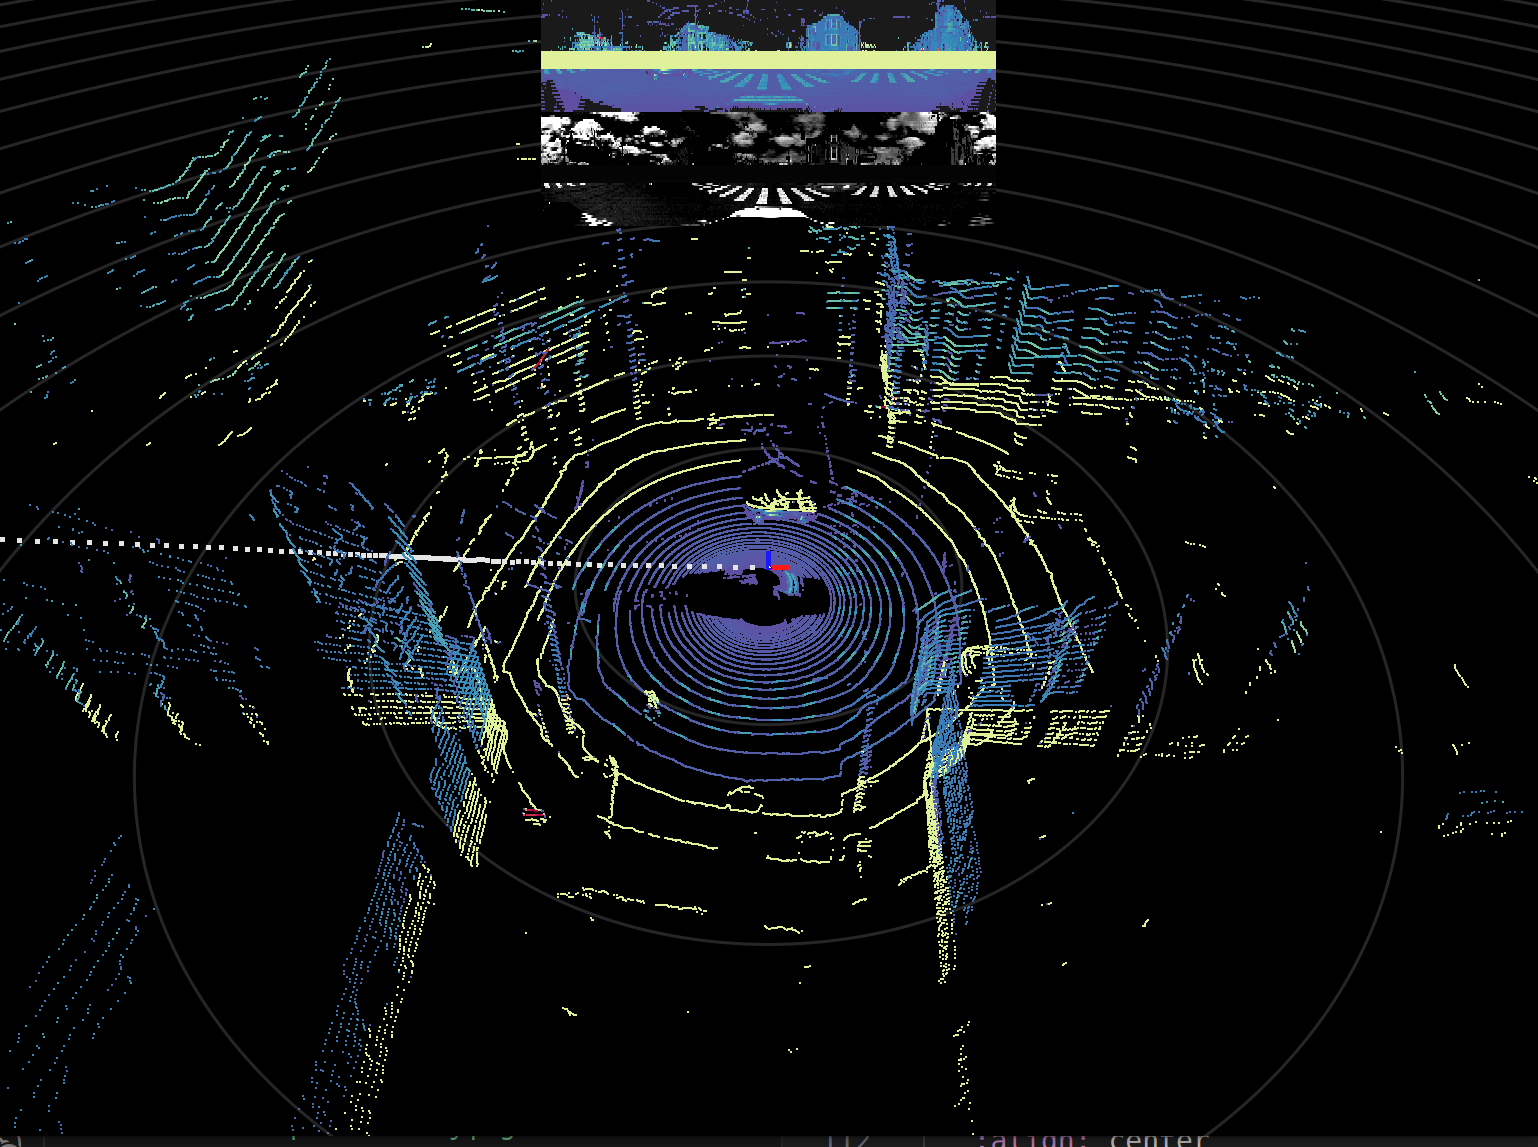
Consider the image from one of Ouster example sequences:
If we apply a filter to the same sequence using the REFLECTIVITY channel and a range of value from 0 to 50 as the filter
command predicate, we can highlight points in the low cloud with higher reflectivity in the scene:
ouster-cli source <source_url> filter REFLECTIVITY :50 viz
Filter based on cartesian coordinates:
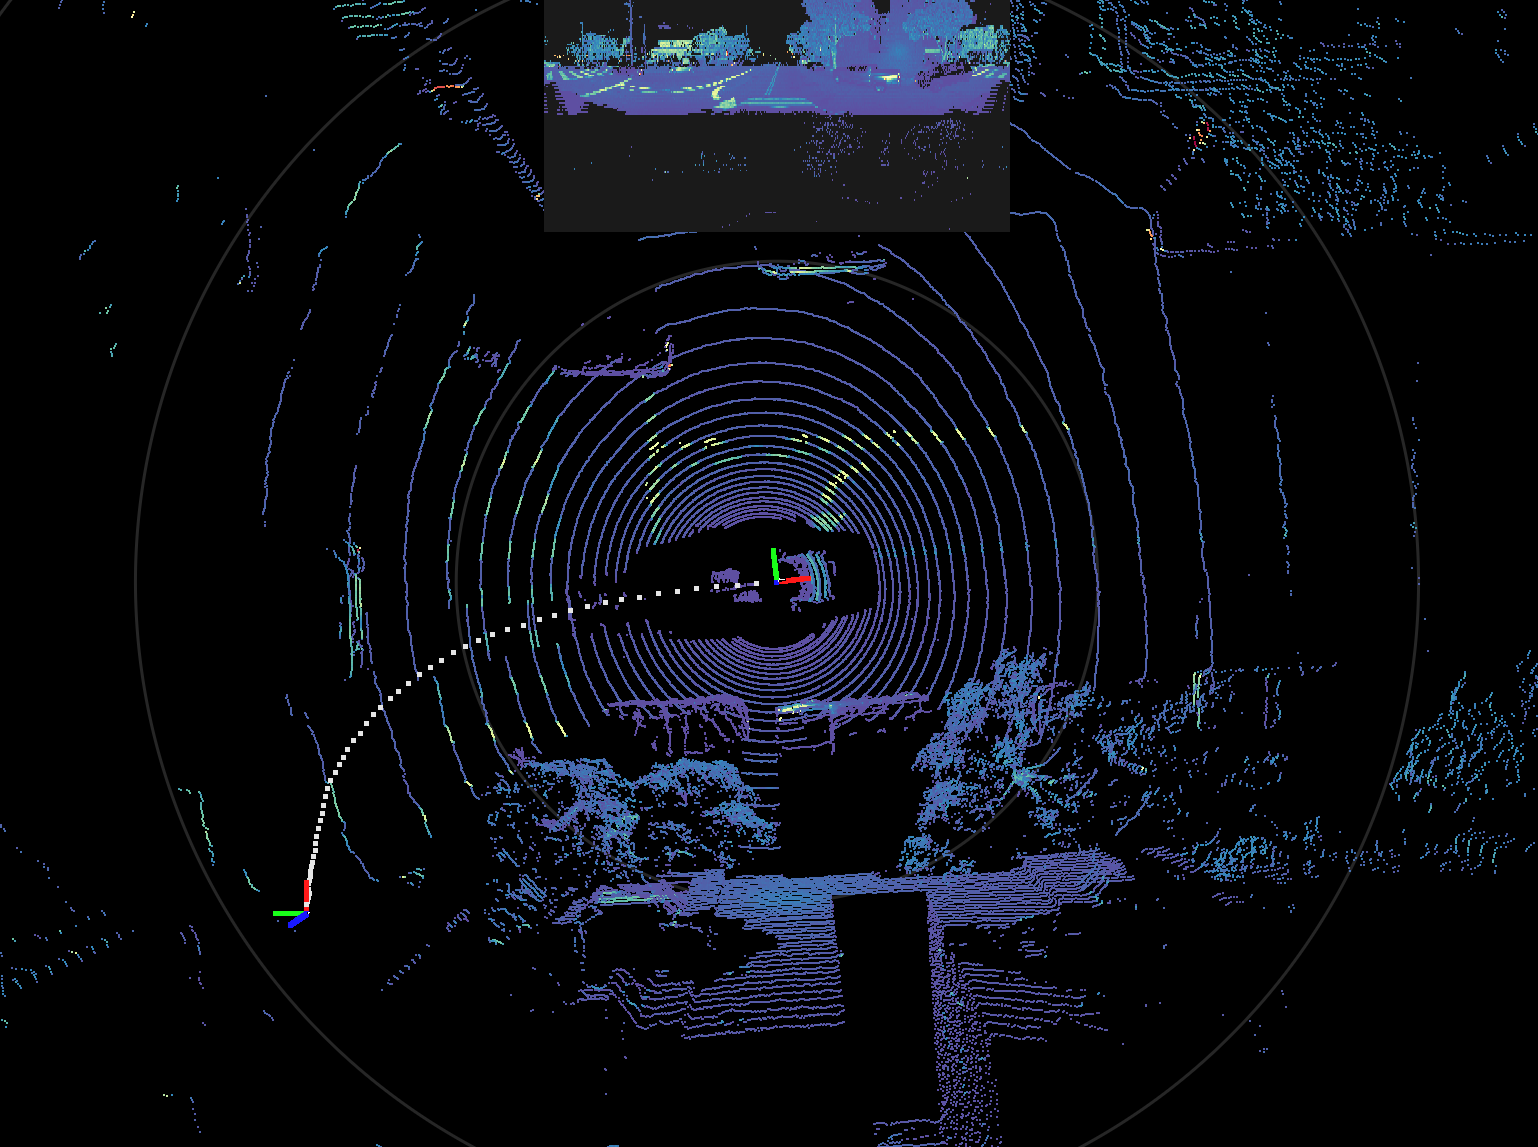
Another way to filter the point cloud is to use the cartesian coordinates of the points. For example, imagine we want to
only view the points that are +/-1 meter up or down from the sensor. We can use the Z axis to filter these points as
follows:
ouster-cli source <source_url> filter Z :-1m filter Z 1m: viz
If you need the XYZ filter in a different coordinate frame, use --coord-frame. For example, dewarp
into WORLD coordinates before filtering:
ouster-cli source <source_url> filter --coord-frame WORLD Z :-1m viz
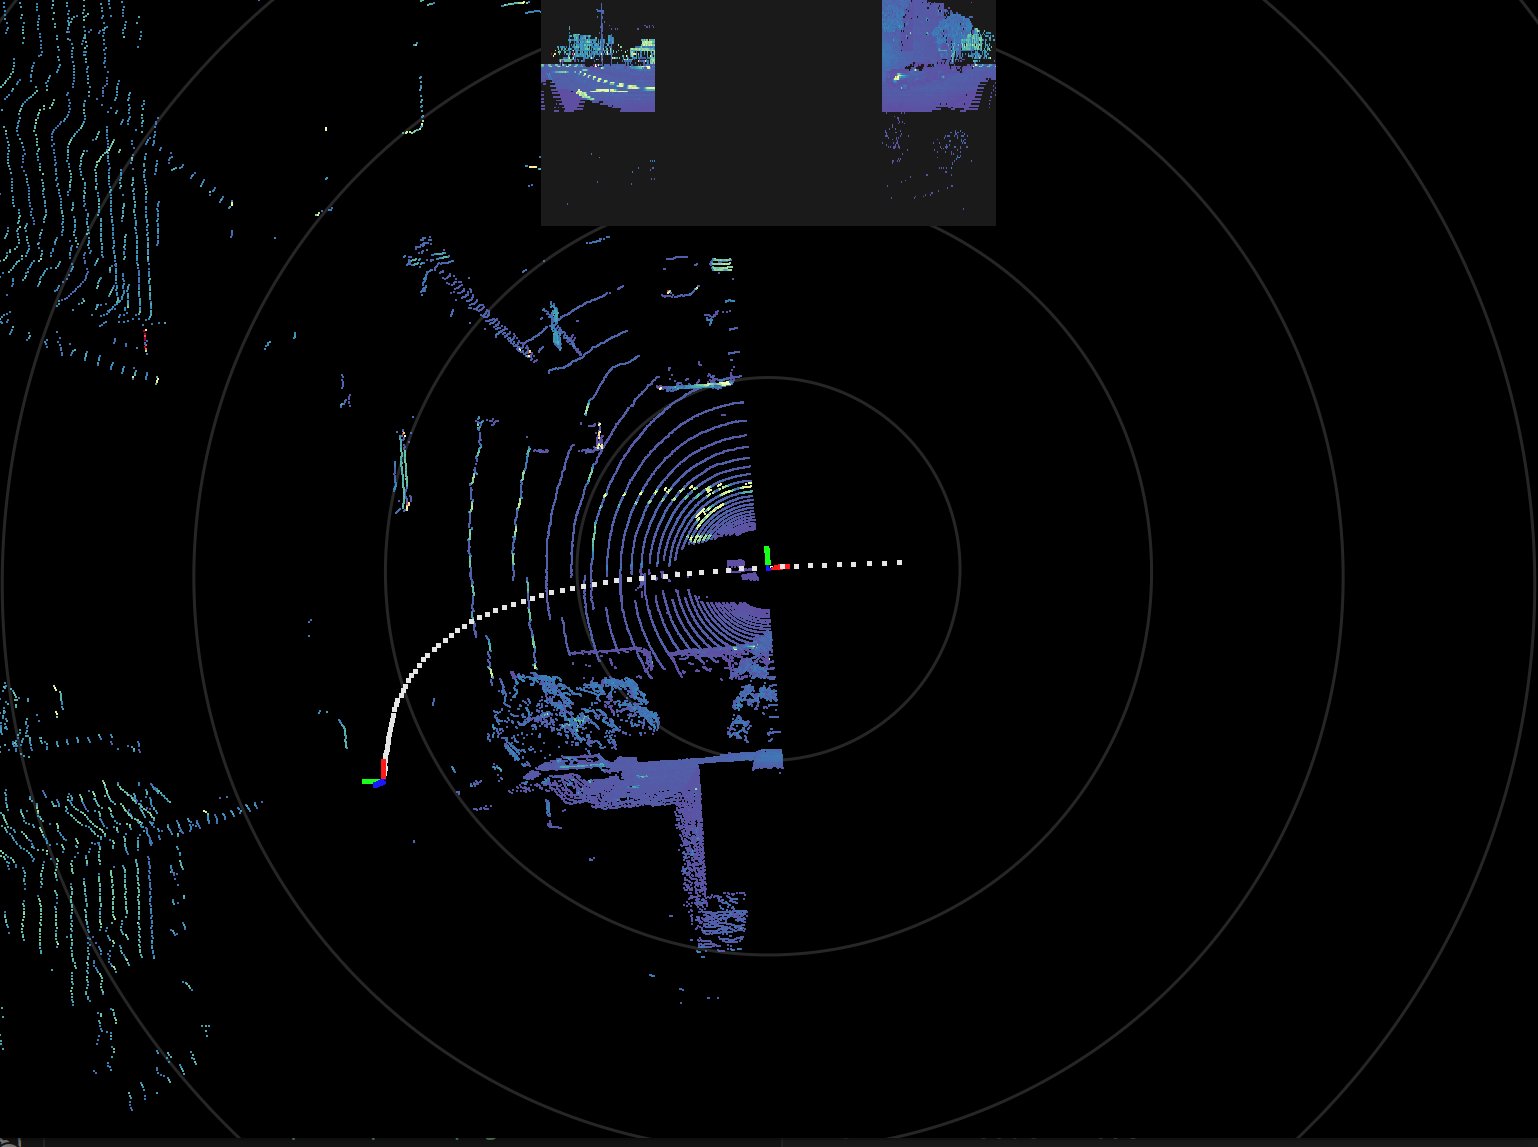
After applying this filter the resulting point cloud will look like this:
As you can see, in this example we cascaded the filter command over the Z axis to suppres points the points the points
of the pointcloud that are outside the range of [-1m, 1m].
Filter based on image coordinates:
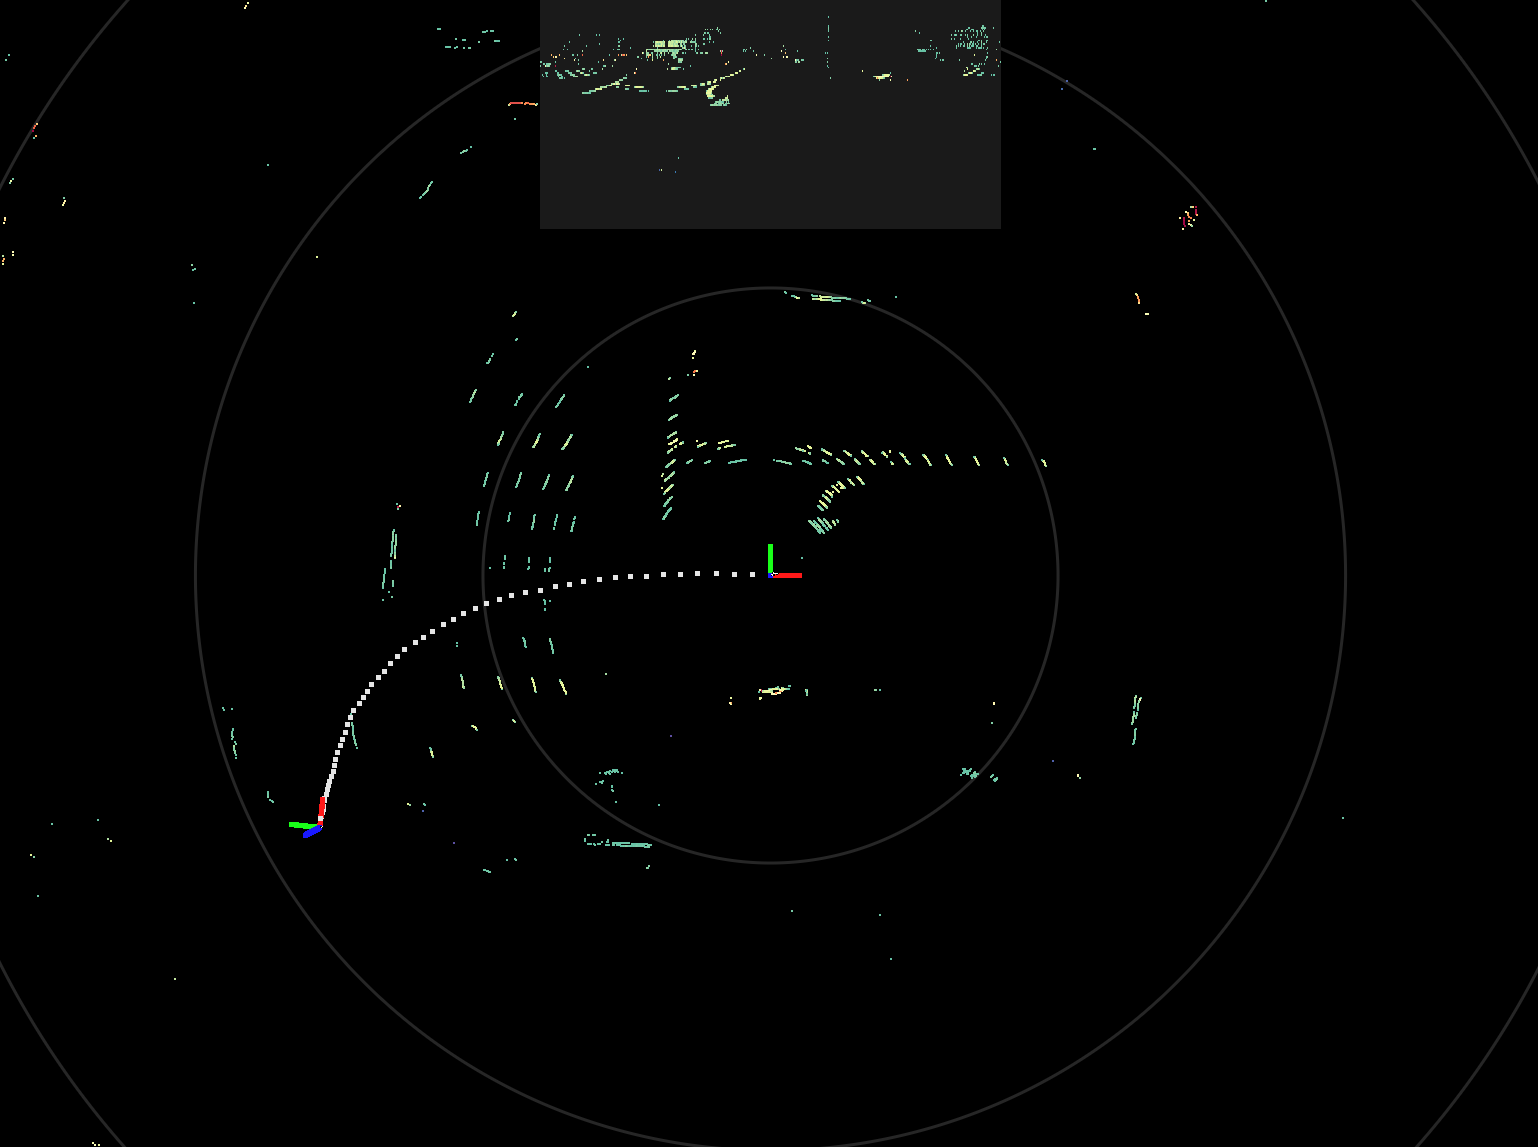
One more way to use the filter command is through image coordinates of the input LidarScan. consider the following example:
ouster-cli source <source_url> filter V 256:768 viz
This command will filter the point cloud to only include points that are in the U coordinate range of 512 to 1536. The resulting point cloud will look like this:
This can be useful to mask out certain columns (V) or certain beams (U) of the LidarScan.
Note
When using the image coordinates for filtering PointClouds, it is important to know the dimensions of the LidarScan as
these coordinates are absolute values in the image space and they don’t wrap around. For example, if the LidarScan has
a size of 128x1024, then the valid range for U is [0, 128] and for V is [0, 1024]. Using values beyond that will
fail.
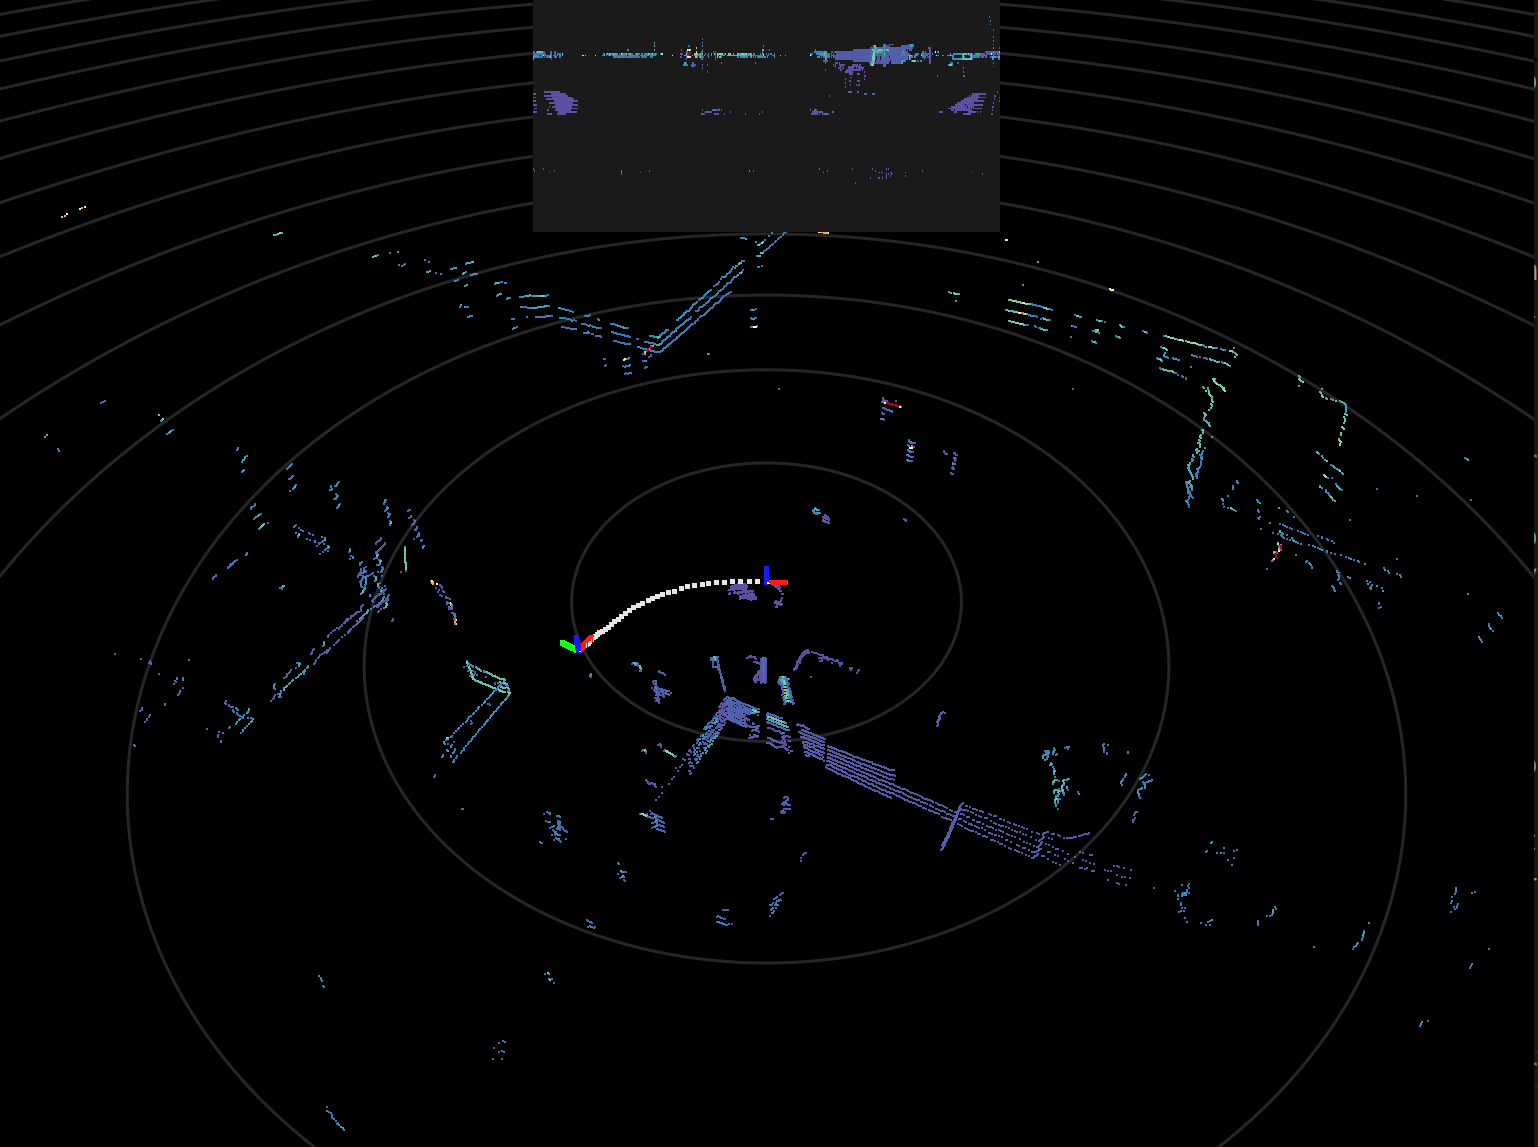
Here is one final example that shows the use of the options --filtered-fields and --invalid-value:
ouster-cli source <source_url> filter --filtered-fields REFLECTIVITY,NEAR_IR --invalid-value 100 U 30:40 viz
The --filtered-fields option allows you to limit the channels that this filter will be applied to, while the --invalid-value
option can be used to choose a value other than zero when overriding pixel values of selected channels. Following is the outcome of
the command: