Networking Guide
This guide will help you understand how to quickly get connected to your sensor to start doing great things with it. When trying to connect to the sensor for the first time there are some basics that need to be achieved for successful communication between the host machine and the sensor.
We need to ensure that the sensor receives an IP address from the host machine so that we can talk to it. This can be achieved with a few different methods such as DHCP, link-local, static IP. We also need to ensure that the sensor and the host machine are talking on the same subnet.
Once the sensor receives an IP address and is on the correct subnet we can talk to it using its hostname, os-991234567890.local, where 991234567890 is the sensor serial number. The sensor serial number can be found on a sticker affixed to the top of the sensor.
Note
DNS Service Discovery text announced by the sensor may provide an incorrect part number that corresponds to an internal code. The correct part number can be found via the Web Interface or HTTP API Reference Guide.
Networking Terminology
If some of this terminology is new to you don’t fret, we have defined some of it for you. Here is some basic terminology that will help you digest the steps and be more familiar with networking in general.
- IPv4 Address
This is the address that can be used to communicate with devices on a network. The format of an IPv4 address is a set of four octets,
xxx.xxx.xxx.xxxwithxxxbeing in the range0-255. For example, your host machine Ethernet port may have an address of192.0.2.1and your sensor may have an address of192.0.2.130.- DHCP (Dynamic Host Configuration Protocol) Server
This is a server that may run on your host machine, switch, or router which will serve an IPv4 address to a device that is connected to it. It will ensure that each device connected will have a unique IPv4 address on the network.
- Link-local IPv4 Address
These are the addresses that are self-assigned between the host machine and a device connected to it in the absence of a DHCP server. They are only valid within the network segment that the host is connected to. The addresses lie within the block
169.254.0.0/16 (169.254.0.0 - 169.254.255.255).- Subnet Mask
This defines which bits of the IPv4 address are the network prefix and which are the host identifiers. See the table below for an example.
Binary Form
Decimal-dot notation
IP address
11000000.00000000.00000010.10000010192.0.2.130Subnet mask
11111111.11111111.11111111.00000000255.255.255.0Network prefix
11000000.00000000.00000010.00000000192.0.2.0Host identifier
00000000.00000000.00000000.100000100.0.0.130
Note
Subnet mask can be abbreviated with the number of bits that apply to the network prefix. E.g. /24 for 255.255.255.0 or /16 for 255.255.0.0.
- Static IPv4 Address
This is when you specify the addresses for the host machine and/or connected device rather than letting the host machine self-assign or using a DHCP server. For example, you may want to specify the host machine IPv4 address to be
192.0.2.100/24and the sensor to be192.0.2.200.- Hostname
This is the more human readable name that comes with your sensor. The sensor’s hostname is
os-991234567890.local, where991234567890is the sensor serial number.
Note
The .local portion of the hostname denotes the local domain used in combination with multicast DNS (mDNS). It is employed when using the sensor in a local network environment with supporting operating system services. This means when the sensor is directly connected to the host machine or if the host machine and sensor are on the same network connected through a router or switch. If you are trying to connect to the sensor on another domain with a supporting DHCP and DNS server configuration you should replace the .local with the domain the sensor is on. For example, if the sensor is connected to a network with domain ouster-domain.com the sensor will be reachable on os-991234567890.ouster-domain.com.
Windows
The following steps have been tested on Windows 10. The sensor’s hostname is os-991234567890.local, where 991234567890 is the sensor serial number. The sensor serial number can be found on a sticker affixed to the top of the sensor.
Connecting the Sensor
Connect the sensor to an available Ethernet port on your host machine or router.
The sensor will automatically obtain an IP address either through link-local or DHCP (if preconfigured) depending on your network configuration.
Note
It can take up to 60 seconds to obtain an IP address from the initial power-up of the sensor.
The Sensor Homepage
Type
os-991234567890.local/ in the address bar of your browser to view the sensor homepage
Note
If you are unable to load the sensor homepage, follow the steps in Determining the IPv4 Address of the Sensor to verify your sensor is on the network and has a valid IPv4 address.
Determining the IPv4 Address of the Sensor
Open a command prompt on the host machine by pressing Win+X and then A
Use the ping command to determine the IPv4 address of the sensor
Command
ping -4 [sensor_hostname]
Example
C:\\WINDOWS\\system32>ping -4 |os-sn|
Note
If this command hangs you may need to go back and configure your interface to link-local in the section Connecting the Sensor
Response
Pinging |os-sn| [|sensor-ip|] with 32 bytes of data:
Reply from |sensor-ip|: bytes=32 time<1ms TTL=64
Reply from |sensor-ip|: bytes=32 time<1ms TTL=64
Reply from |sensor-ip|: bytes=32 time<1ms TTL=64
Reply from |sensor-ip|: bytes=32 time<1ms TTL=64

Ping statistics for |sensor-ip|:
  Packets: Sent = 4, Received = 4, Lost = 0 (0% loss),
Approximate round trip times in milli-seconds:
Minimum = 0ms, Maximum = 0ms, Average = 0ms
Note
In this example, your sensor IPv4 address is determined to be 169.254.0.123.
If your sensor IPv4 address is of the form 169.254.x.x it is connected via link-local.
You can also browse for the sensor IPv4 address using dns-sd and the sensor hostname. Learn more about this in Finding a Sensor with mDNS Service Discovery
Command
dns-sd -G v4 [sensor_hostname]
Example
C:\\WINDOW\\system32>dns-sd -G v4 |os-sn|
Response
Timestamp     A/R  Flags   if   Hostname                Address         TTL
14:22:46.897  Add  2       6    |os-sn|  |sensor-ip|   120
Note
In this example, your sensor IPv4 address is determined to be 169.254.0.123. If your sensor IPv4 address is of the form 169.254.x.x it is connected via link-local.
Determining the IPv4 Address of the Interface
Open a command prompt by pressing Win+X and then A
View the IPv4 address of your interfaces
Command
netsh interface ip show config
Example
C:\\WINDOWS\\system32>netsh interface ip show config
Response
Configuration for interface "Local Area Connection"
    DHCP enabled:                         Yes
    IP Address:                           |interface-ip|
    Subnet Prefix:                        169.254.0.0/16 (mask 255.255.0.0)
    InterfaceMetric:                      25
    DNS servers configured through DHCP:  None
    Register with which suffix:           Primary only
    WINS servers configured through DHCP: None

Configuration for interface "Loopback Pseudo-Interface 1"
    DHCP enabled:                         No
    IP Address:                           127.0.0.1
    Subnet Prefix:                        127.0.0.0/8 (mask 255.0.0.0)
    InterfaceMetric:                      75
    Statically Configured DNS Servers:    None
    Register with which suffix:           Primary only
    Statically Configured WINS Servers:   None
In this example, your sensor is plugged into interface “Local Area Connection”
Your host IPv4 address will be on the line that starts with IP Address: In this case it is
169.254.0.1
Note
If your interface IPv4 address is of the form 169.254.x.x, it is connected via link-local to the sensor. This means that Windows self-assigned an IP address in the absence of a DHCP server.
Setting the Host Interface to DHCP
Use this to set your interface to automatically obtain an IP address via DHCP. This is useful for architectures that need to be more plug and play.
Set your interface to DHCP.
Command
netsh interface ip set address ["Network Interface Name"] dhcp
Example
with interface name "Local Area Connection"
C:\\WINDOWS\\system32>netsh interface ip set address "Local Area Connection" dhcp
Response
blank
Setting the Host Interface to Static IP
Use this to set your interface to be assigned a static IPv4 address. This is useful for controlling the IP address that the sensor will be sending data to.
Set your interface to static.
Command
netsh interface ip set address name="Network Interface Name" static [IP address] [Subnet Mask]
[Gateway]
Example
with interface name “Local Area Connection” and IPv4 address 192.0.2.1/24.
C:\\WINDOWS\\system32>netsh interface ip set address name="Local Area Connection"
 static 192.0.2.1/24
Note
The /24 is shorthand for Subnet Mask = 255.255.255.0
Response
blank
Finding a Sensor with mDNS Service Discovery
The sensor announces its presence on the network using Multicast Domain Name Service (mDNS) with a service type named _roger._tcp. You can use service discovery tools such as Bonjour browser (Windows) to find all sensors connected to the network.
Note
Click Bonjour to install Bonjour Browser.
Example using Bonjour Browser:
Step 1: User can download the Bonjour Browser

Downloading Application
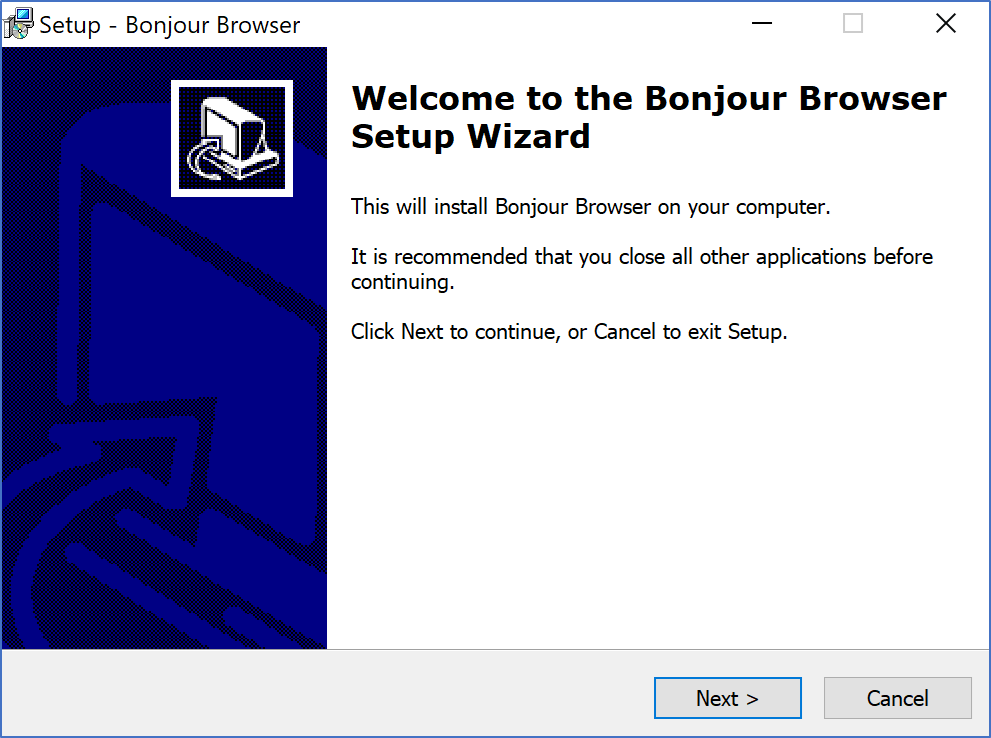
Software Setup and Installation
Step 2: Sensor announces its presence on the network using Multicast Domain Name Service (mDNS) with a service type named _roger._tcp. Click on this to get all the information required.
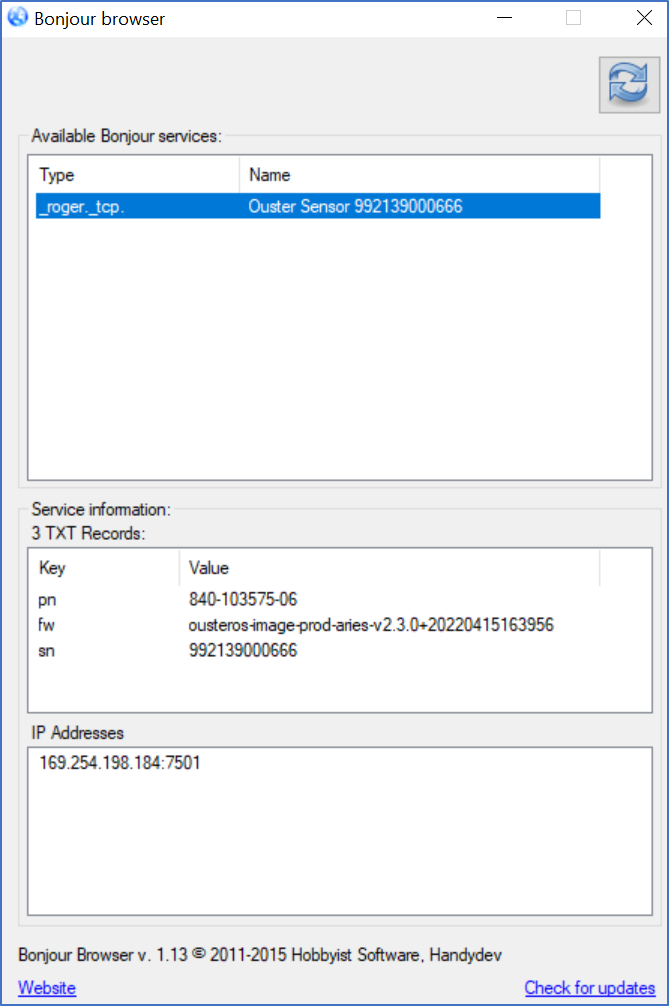
_roger._tcp
macOS
The following steps have been tested on macOS 10.15.4. The sensor’s hostname is os-991234567890.local, where 991234567890 is the sensor serial number. The sensor serial number can be found on a sticker affixed to the top of the sensor.
Connecting the Sensor
Connect the sensor to an available Ethernet port on your host machine or router.
The sensor will automatically obtain an IP address either through link-local or DHCP (if preconfigured) depending on your network configuration.
Note
It can take up to 60 seconds to obtain an IP address from the initial power-up of the sensor.
The Sensor Homepage
Type
os-991234567890.localin the address bar of your browser to view the sensor homepage
Note
If you are unable to load the sensor homepage, follow the steps in Determining the IPv4 Address of the Sensor to verify your sensor is on the network and has a valid IPv4 address.
Determining the IPv4 Address of the Sensor
Open a Terminal window on the host machine by pressing CMD+SPACE and typing Terminal in the search bar, then press enter.
Use the ping command to determine the IPv4 address of the sensor
Command
ping -c3 [sensor_hostname]
Example
Mac-Computer:~ username$ ping -c3 |os-sn|
Note
If this command hangs you may need to go back and configure your interface to link-local in the section Connecting the Sensor
Response
PING |os-sn| (|sensor-ip|): 56 data bytes
64 bytes from |sensor-ip|: icmp_seq=0 ttl=64 time=0.644 ms
64 bytes from |sensor-ip|: icmp_seq=1 ttl=64 time=0.617 ms
64 bytes from |sensor-ip|: icmp_seq=2 ttl=64 time=0.299 ms

--- |os-sn| ping statistics ---
3 packets transmitted, 3 packets received, 0.0% packet loss
round-trip min/avg/max/stddev = 0.299/0.520/0.644/0.157 ms
Note
In this example, your sensor IPv4 address is determined to be 169.254.0.123. If your sensor IPv4 address is of the form 169.254.x.x it is connected via link-local.
You can also browse for the sensor IPv4 address using dns-sd and the sensor hostname. Learn more about this in Finding a Sensor
Command
dns-sd -G v4 [sensor_hostname]
Example
Mac-Computer:~ username$ dns-sd -G v4 |os-sn|
Response
DATE: ---Tue 28 Apr 2020---
11:40:43.228  ...STARTING...
Timestamp     A/R  Flags  if  Hostname                Address           TTL
11:40:43.414  Add  2      18  |os-sn|.  |sensor-ip|     120
Note
In this example, your sensor IPv4 address is determined to be 169.254.0.123. If your sensor IPv4 address is of the form 169.254.x.x it is connected via link-local.
Determining the IPv4 Address of the Interface
This will help you find the IPv4 address of the interface that you have plugged the sensor into. It is helpful to know which interface you have plugged into, e.g. en1 in the example below.
Open a Terminal window on the host machine by pressing CMD+SPACE and typing Terminal in the search bar, then press enter.
View the IPv4 address of your interfaces
Command
ifconfig
Example
Mac-Computer:~ username$ ifconfig
Response
   lo0: flags=8049<UP,LOOPBACK,RUNNING,MULTICAST> mtu 16384
      options=1203<RXCSUM,TXCSUM,TXSTATUS,SW_TIMESTAMP>
      inet 127.0.0.1 netmask 0xff000000
      inet6 ::1 prefixlen 128
      inet6 fe80::1%lo0 prefixlen 64 scopeid 0x1
      nd6 options=201<PERFORMNUD,DAD>
   en0: flags=8863<UP,BROADCAST,SMART,RUNNING,SIMPLEX,MULTICAST> mtu 1500
      options=400<CHANNEL_IO>
      ether 38:f9:d3:d6:33:8a
      inet6 fe80::1c30:1246:93a2:9f68%en0 prefixlen 64 secured scopeid 0x7
      inet 192.0.2.7 netmask 0xffffff00 broadcast 192.0.2.255
      nd6 options=201<PERFORMNUD,DAD>
      media: autoselect
      status: active
   en1: flags=8963<UP,BROADCAST,SMART,RUNNING,SIMPLEX,MULTICAST> mtu 1500
      options=400<CHANNEL_IO>
      ether 48:65:ee:1d:22:35
      inet6 fe80::c27:1917:47ed:bcfe%en1 prefixlen 64 secured scopeid 0x12
      inet |interface-ip| netmask 0xffff0000 broadcast 169.254.255.255
      nd6 options=201<PERFORMNUD,DAD>
      media: autoselect (1000baseT <full-duplex>)
      status: active


* In this example, your sensor is plugged into interface ``en1``
* Your host IPv4 address will be on the line that starts with ``inet``: In this case it is |interface-ip|
Note
If your interface IPv4 address is of the form 169.254.x.x, it is connected via link-local to the sensor. This means that the macOS self-assigned an IP address in the absence of a DHCP server.
Setting the Host Interface to DHCP
Use this to set your interface to automatically obtain an IP address via DHCP. This is useful for architectures that need to be more plug and play.
Set your interface to DHCP
Command
sudo ipconfig set [interface_name] DHCP
Example
with interface name en1
Mac-Computer:~ username$ sudo ipconfig set en1 DHCP
Response
blank

Note: However you can verify the change has been made with the ``ifconfig`` command.
      The ``inet`` line will be blank if nothing is plugged in or shows the DHCP or
      link-local self-assigned IPv4 address. E.g. |interface-ip|


en1: flags=8863<UP,BROADCAST,SMART,RUNNING,SIMPLEX,MULTICAST> mtu 1500

options=6407<RXCSUM,TXCSUM,VLAN_MTU,CHANNEL_IO,PARTIAL_CSUM,ZEROINVERT_CSUM>
   ether 48:65:ee:1d:22:35
   inet6 fe80::1c24:5e0a:2ea8:12e9%en1 prefixlen 64 secured scopeid 0x7
   inet |interface-ip| netmask 0xffff0000 broadcast 169.254.255.255
   nd6 options=201<PERFORMNUD,DAD>
   media: autoselect (1000baseT <full-duplex>)
   status: active
Setting the Host Interface to Static IP
Use this to set your interface to be assigned a static IPv4 address. This is useful for controlling the IP address that the sensor will be sending data to.
Set your interface to static
Command
sudo ipconfig set [interface_name] MANUAL [ip_address] [subnet_mask]
Example
with interface name en1 and IPv4 address 192.0.2.1 and subnet mask 255.255.255.0.
Mac-Computer:~ username$ sudo ipconfig set en1 MANUAL 192.0.2.1 255.255.255.0
Note
The /24 is shorthand for Subnet Mask = 255.255.255.0
Response
blank

Note: However you can verify the change has been made with the ``ifconfig`` command.
      The ``inet`` line will show the static IPv4 address. e.g. ``192.0.2.1``.

en1: flags=8863<UP,BROADCAST,SMART,RUNNING,SIMPLEX,MULTICAST> mtu 1500

options=6407<RXCSUM,TXCSUM,VLAN_MTU,CHANNEL_IO,PARTIAL_CSUM,ZEROINVERT_CSUM>
 ether 48:65:ee:1d:22:35
 inet6 fe80::1c24:5e0a:2ea8:12e9%en1 prefixlen 64 secured scopeid 0x7
 inet 192.0.2.1 netmask 0xffffff00 broadcast 192.0.2.255
 nd6 options=201<PERFORMNUD,DAD>
 media: autoselect (1000baseT <full-duplex>)
 status: active
Finding a Sensor
With mDNS Service Discovery:
The sensor announces its presence on the network using Multicast Domain Name Service (mDNS) with a service type named _roger._tcp. You can use service discovery tools such as dns-sd (Windows/macOS) to find all sensors connected to the network.
Find all sensors and their associated service text on a network.
Command
dns-sd -Z [service type]
Example
Mac-Computer:~ username$ dns-sd -Z _roger._tcp
Response
Browsing for _roger._tcp
DATE: ---Thu 30 Apr 2020---
17:27:52.242  ...STARTING...

; To direct clients to browse a different domain, substitute that domain in
 place of '@'
lb._dns-sd._udp                                 PTR     @

; In the list of services below, the SRV records will typically reference dot-local
 Multicast DNS names.
; When transferring this zone file data to your unicast DNS server, you'll need to
 replace those dot-local
; names with the correct fully-qualified (unicast) domain name of the target host
 offering the service.

_roger._tcp                                   PTR
Ouster Sensor |sn|._roger._tcp
Ouster Sensor |sn|._roger._tcp    SRV     0 0 7501 |os-sn|. ;
Replace with unicast FQDN of target host
Ouster Sensor |sn|._roger._tcp    TXT     "pn=840-102145-B" "sn= |sn|"
"fw=ousteros-image-prod-aries-v2.0.0-20200417193957" "sn= |sn|"
Browse for the sensor IPv4 address using dns-sd and the sensor hostname.
Command
dns-sd -G v4 [sensor_hostname]
Example
Mac-Computer:~ username$ dns-sd -G v4 |os-sn|
Response
DATE: ---Thu 30 Apr 2020---
17:37:33.155  ...STARTING...
Timestamp     A/R  Flags  if  Hostname                Address           TTL
17:37:33.379  Add  2      7   |os-sn|.  |sensor-ip|     120
Note
In this example, your sensor IPv4 address is determined to be 169.254.0.123
With Discovery App:
Step 1: User can download the Discovery DNS-SD
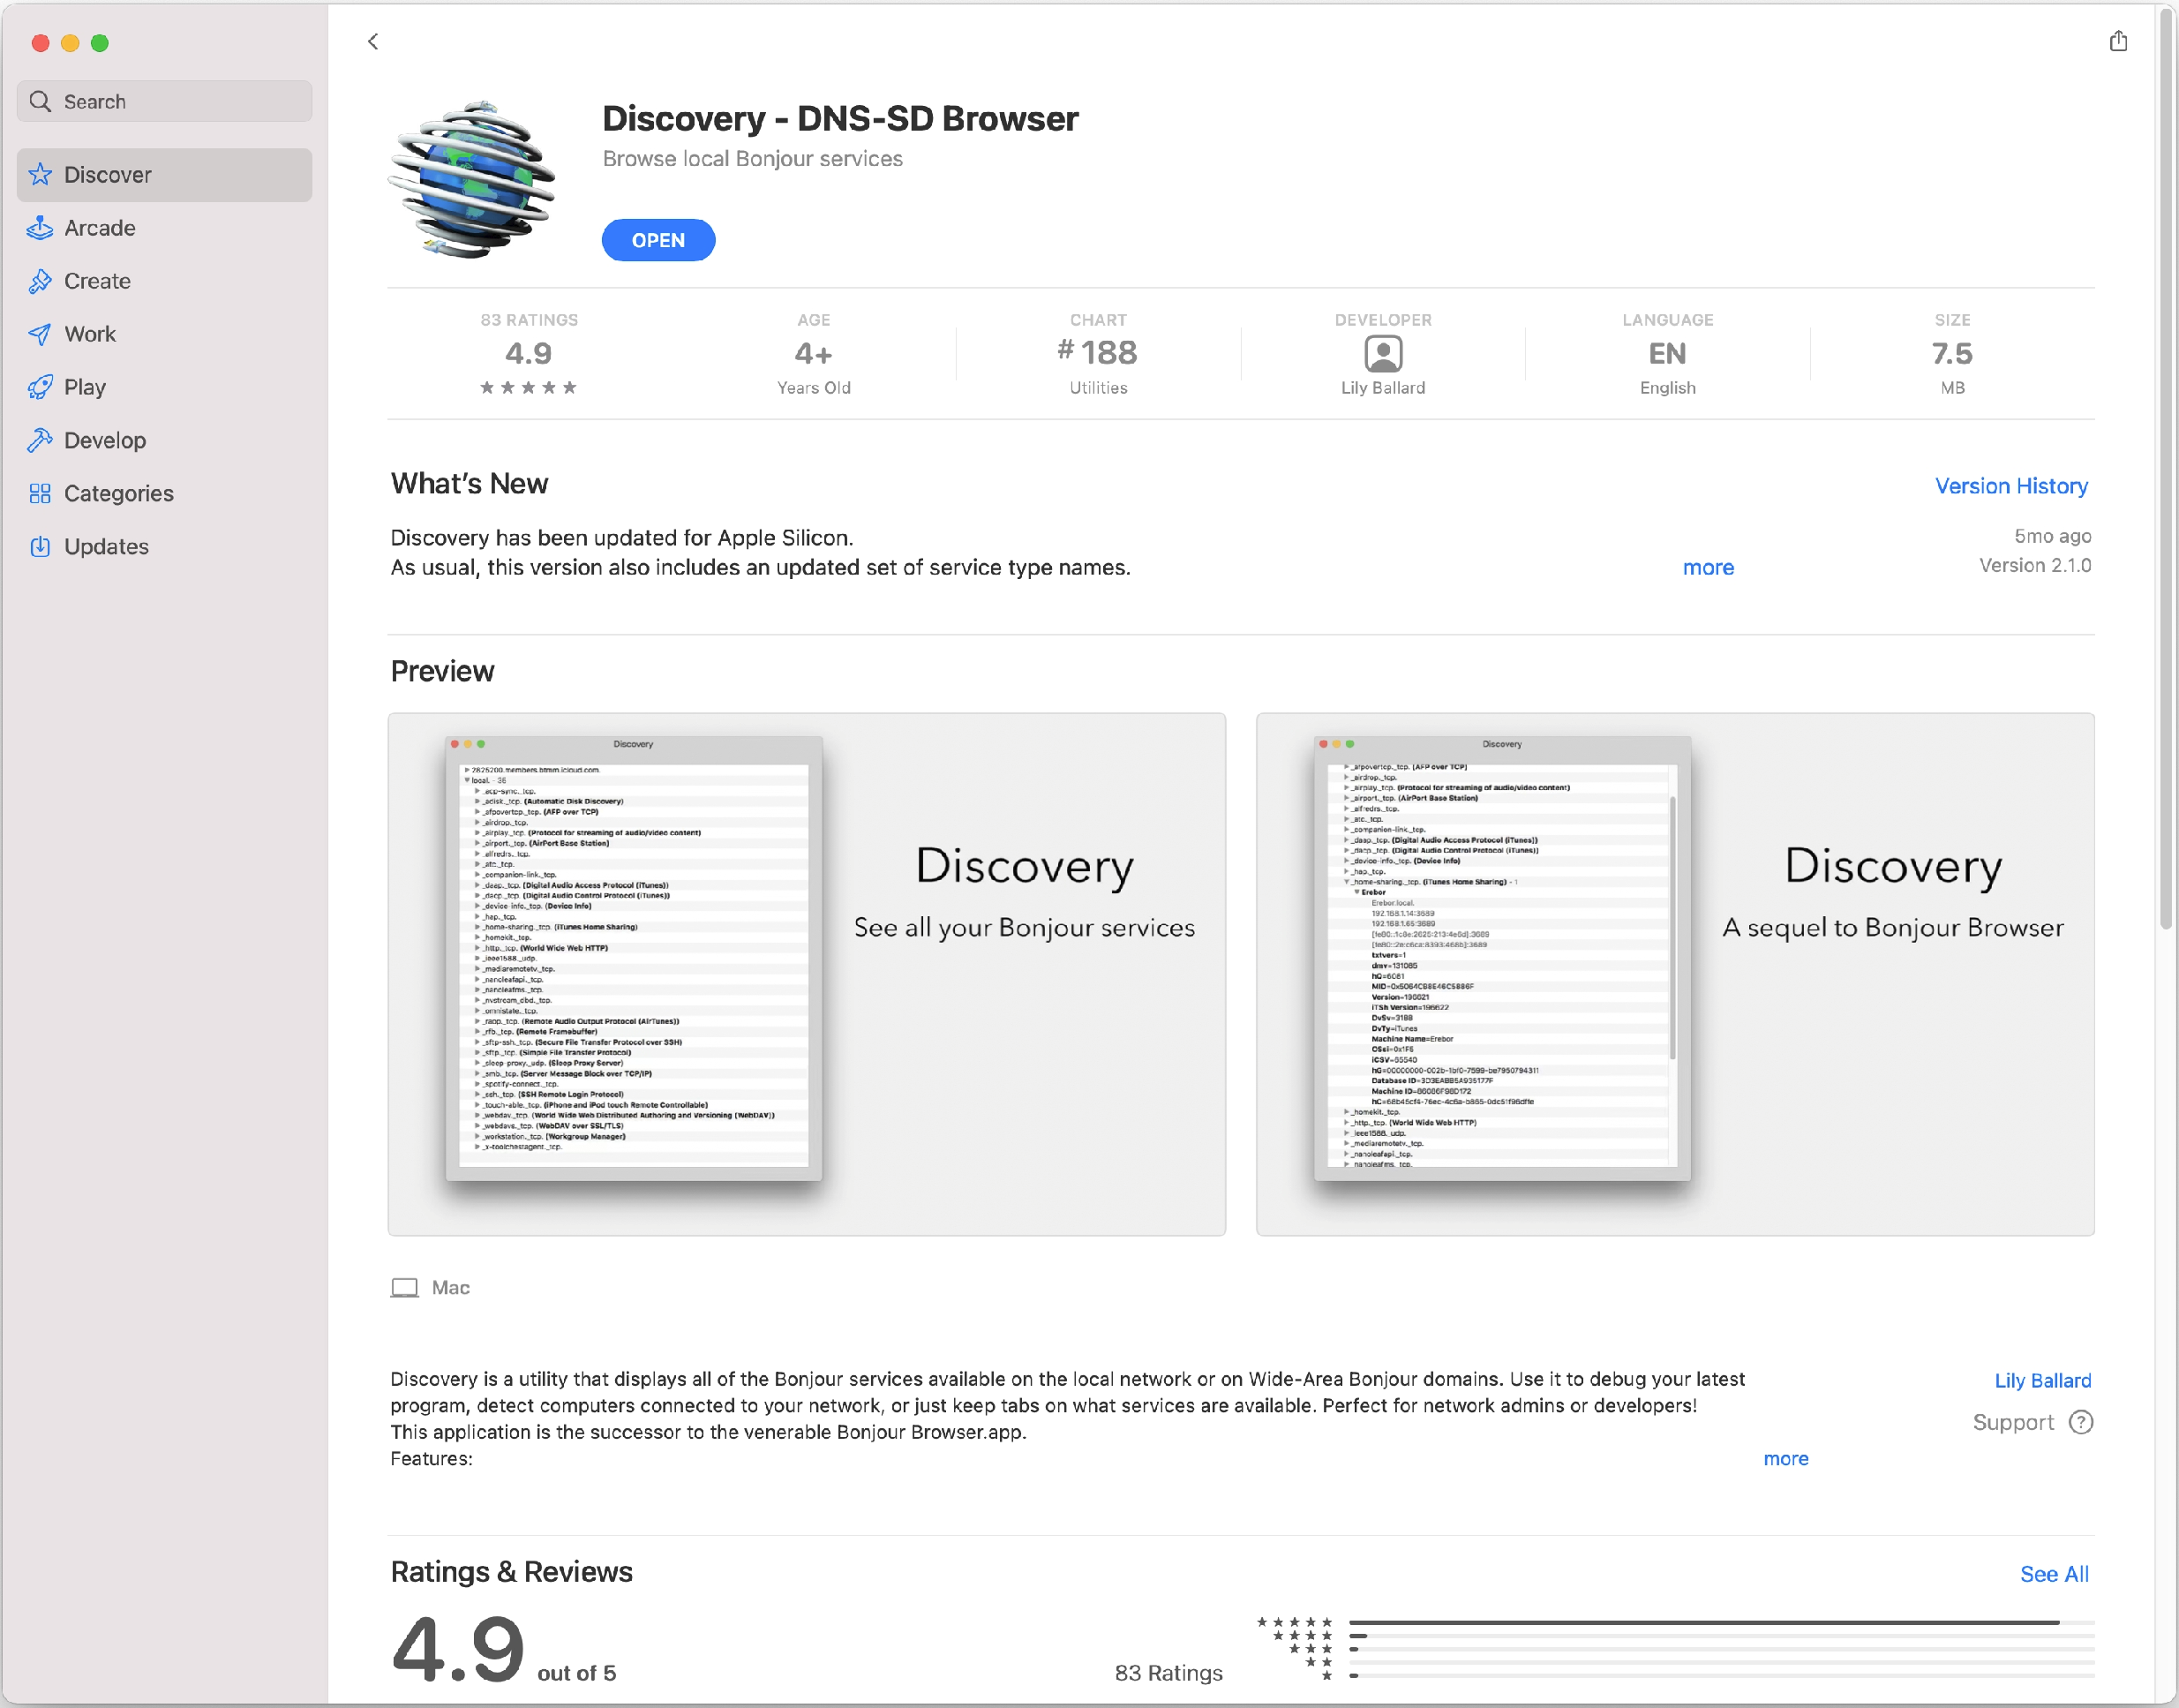
Downloading Application
Step 2: Using finder, the user can search for Discovery
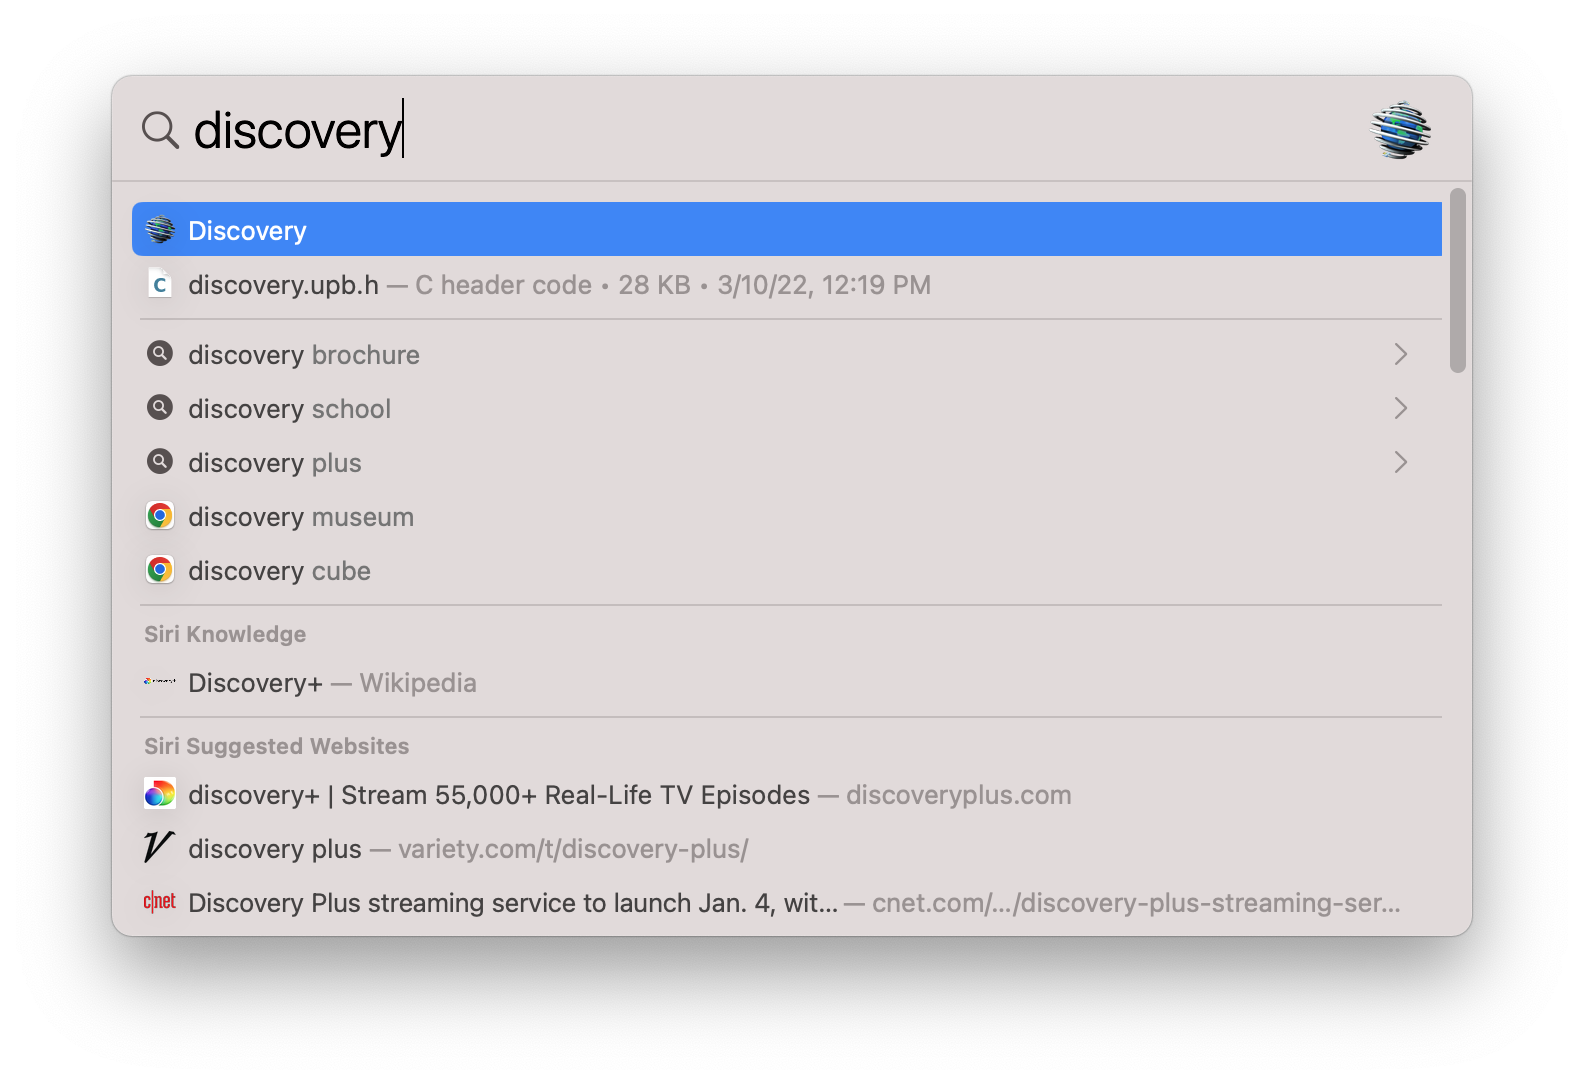
Finding the Application
Step 3: Sensor announces its presence on the network using Multicast Domain Name Service (mDNS) with a service type named _roger._tcp. Click on this to get all the information required.
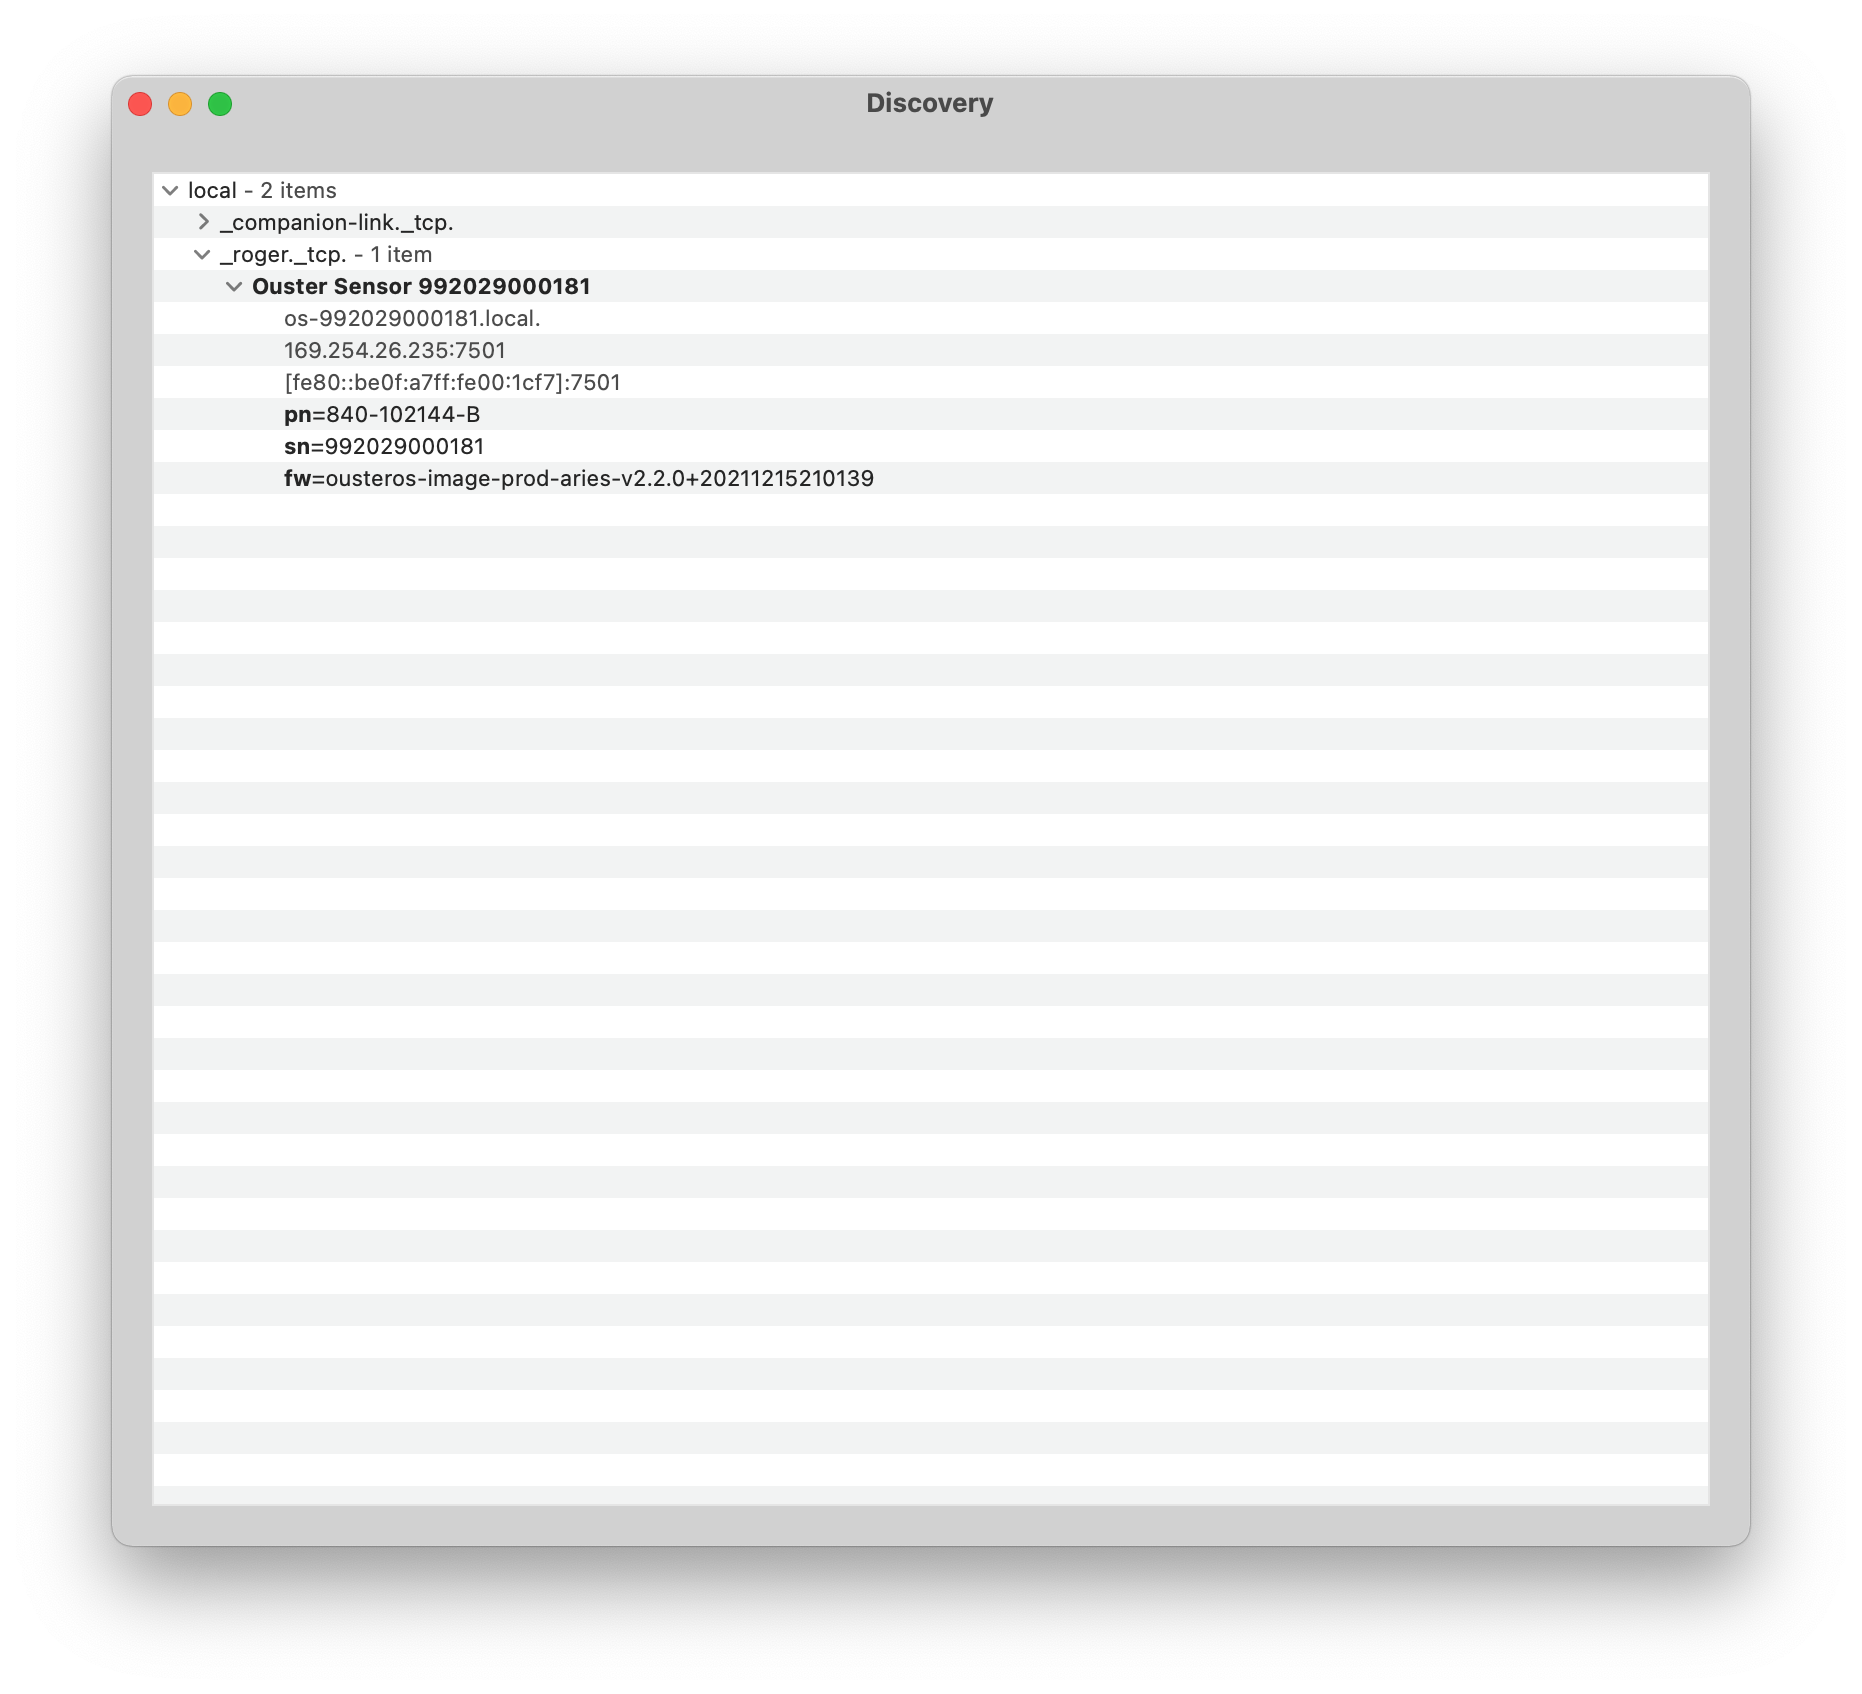
_roger._tcp
Linux
The following steps have been tested on Ubuntu 18.04 & 20.04.4 LTS. The sensor’s hostname is os-991234567890.local, where 991234567890 is the sensor serial number. The sensor serial number can be found on a sticker affixed to the top of the sensor.
Connecting the Sensor
Connect the sensor to an available Ethernet port on your host machine or router.
The sensor will automatically obtain an IP address either through link-local or DHCP (if preconfigured) depending on your network configuration.
If directly connecting to the host machine you may need to set your Ethernet interface to
Link-Local Onlymode. This can be done via the command line or GUI. See instructions in Setting the Interface to Link-Local Only
Note
It can take up to 60 seconds to obtain an IP address from the initial power-up of the sensor.
Setting the Interface to Link-Local Only
Via Command Line
Command
nmcli con modify [interface_name] ipv4.method link-local ipv4.addresses ""
Note
To identify the name of your connection, please use the command: nmcli connection show.
Example
with interface name eth0 and IPv4 address "".
username@ubuntu:~$ nmcli con modify eth0 ipv4.method link-local ipv4.addresses ""
Response
blank

Note: However you can verify the change has been made with the ``ip addr`` command.
      The ``inet`` line for the interface ``eth0`` will show the link-local IPv4 address automatically
      negotiated once the sensor is reconnected to the interface. e.g. |interface-ip|.


1: lo: <LOOPBACK,UP,LOWER_UP> mtu 65536 qdisc noqueue state UNKNOWN group
       default qlen 1000
   link/loopback 00:00:00:00:00:00 brd 00:00:00:00:00:00
   inet 127.0.0.1/8 scope host lo
      valid_lft forever preferred_lft forever
   inet6 ::1/128 scope host
      valid_lft forever preferred_lft forever
2: eth0: <BROADCAST,MULTICAST,UP,LOWER_UP> mtu 1500 qdisc fq_codel state UP group
       default qlen 1000
   link/ether 00:0c:29:2b:cc:48 brd ff:ff:ff:ff:ff:ff
   inet |interface-ip|/16 brd 169.254.255.255 scope link noprefixroute eth0
      valid_lft forever preferred_lft forever
   inet6 fe80::be9f:d2a4:4451:3dfe/64 scope link noprefixroute
      valid_lft forever preferred_lft forever
3: wlan0: <BROADCAST,MULTICAST,UP,LOWER_UP> mtu 1500 qdisc fq_codel state UP group
   default qlen 1000
   link/ether 00:50:56:28:7a:8a brd ff:ff:ff:ff:ff:ff
   inet 172.16.79.232/24 brd 172.16.79.255 scope global wlan0
      valid_lft forever preferred_lft forever
   inet6 fe80::250:56ff:fe28:7a8a/64 scope link
      valid_lft forever preferred_lft forever
Via GUI: The image below illustrates how to set the interface to Link-Local Only mode using the graphical user interface.

Note
It can take up to 60 seconds to obtain an IP address from the initial power-up of the sensor.
The Sensor Homepage
Type
os-991234567890.local/ in the address bar of your browser to view the sensor homepage
Note
If you are unable to load the sensor homepage, follow the steps in Determining the IPv4 Address of the Sensor to verify your sensor is on the network and has a valid IPv4 address.
Determining the IPv4 Address of the Sensor
Open a Terminal window on the host machine by pressing Ctrl+Alt+T.
Use the
pingcommand to determine the IPv4 address of the sensor
Command
ping -4 -c3 [sensor_hostname]
Example
username@ubuntu:~$ ping -4 -c3 |os-sn|
Note
If this command hangs you may need to go back and configure your interface to link-local in the section Setting the Interface to Link-Local Only
Response
PING |os-sn| (|sensor-ip|) 56(84) bytes of data.
64 bytes from |os-sn| (|sensor-ip|): icmp_seq=1 ttl=64 time=1.56 ms
64 bytes from |os-sn| (|sensor-ip|): icmp_seq=2 ttl=64 time=0.893 ms
64 bytes from |os-sn| (|sensor-ip|): icmp_seq=3 ttl=64
time=0.568 ms

--- |os-sn| ping statistics ---
3 packets transmitted, 3 received, 0% packet loss, time 2025ms
rtt min/avg/max/mdev = 0.568/1.008/1.565/0.416 ms
Note
In this example, your sensor IPv4 address is determined to be 169.254.0.123. If your sensor IPv4 address is of the form 169.254.x.x it is connected via link-local.
You can also browse for the sensor IPv4 address using
avahi-browseand the sensor service type, which is_roger._tcp. Learn more about this in Finding a Sensor with mDNS Service Discovery
Command
avahi-browse -lrt [service type]
Example
username@ubuntu:~$ avahi-browse -lrt _roger._tcp
Response
+   eth0 IPv6 Ouster Sensor |sn|                    _roger._tcp          local
+   eth0 IPv4 Ouster Sensor |sn|                    _roger._tcp          local
=   eth0 IPv6 Ouster Sensor |sn|                    _roger._tcp          local
   hostname = [|os-sn|]
   address = [fe80::be0f:a7ff:fe00:1852]
   port = [7501]
   txt = ["fw=ousteros-image-prod-aries-v2.0.0-20200417193957" "sn=99201000067
8" "pn=840-102145-B"]
=   eth0 IPv4 Ouster Sensor |sn|                    _roger._tcp          local
   hostname = [|os-sn|]
   address = [|sensor-ip|]
   port = [7501]
   txt = ["fw=ousteros-image-prod-aries-v2.0.0-20200417193957" "sn= |sn|"
          "pn=840-102145-B"]
Note
In this example, your sensor IPv4 address is determined to be 169.254.0.123. If your sensor IPv4 address is of the form 169.254.x.x it is connected via link-local.
Determining the IPv4 Address of the Interface
This will help you find the IPv4 address of the interface that you have plugged the sensor into. It is helpful to know which interface you have plugged into, e.g. eth0 in the example below.
Open a Terminal window on the host machine by pressing Ctrl+Alt+T.
View the IPv4 address of your interfaces
Command
ip addr
Example
username@ubuntu:~$ ip addr
Response
1: lo: <LOOPBACK,UP,LOWER_UP> mtu 65536 qdisc noqueue state UNKNOWN group
       default qlen 1000
    link/loopback 00:00:00:00:00:00 brd 00:00:00:00:00:00
    inet 127.0.0.1/8 scope host lo
       valid_lft forever preferred_lft forever
    inet6 ::1/128 scope host
       valid_lft forever preferred_lft forever
2: eth0: <BROADCAST,MULTICAST,UP,LOWER_UP> mtu 1500 qdisc fq_codel state UP group
       default qlen 1000
    link/ether 00:0c:29:2b:cc:48 brd ff:ff:ff:ff:ff:ff
    inet |interface-ip|/16 brd 169.254.255.255 scope link noprefixroute eth0
       valid_lft forever preferred_lft forever
    inet6 fe80::be9f:d2a4:4451:3dfe/64 scope link noprefixroute
       valid_lft forever preferred_lft forever
3: wlan0: <BROADCAST,MULTICAST,UP,LOWER_UP> mtu 1500 qdisc fq_codel state UP group
       default qlen 1000
    link/ether 00:50:56:28:7a:8a brd ff:ff:ff:ff:ff:ff
    inet 192.0.2.232/24 brd 192.0.2.255 scope global wlan0
       valid_lft forever preferred_lft forever
    inet6 fe80::250:56ff:fe28:7a8a/64 scope link
       valid_lft forever preferred_lft forever
4: gpd0: <POINTOPOINT,MULTICAST,NOARP> mtu 1500 qdisc noop state DOWN group
       default qlen 500
    link/none
In this example, your sensor is plugged into interface
eth0.Your host IPv4 address will be on the line that starts with
inet: In this case it is169.254.0.1.
Note
If your interface IPv4 address is of the form 169.254.x.x, it is connected via link-local to the sensor. This means that the Linux self-assigned an IP address in the absence of a DHCP server.
Setting the Host Interface to DHCP
Use this to set your interface to automatically obtain an IP address via DHCP. This is useful for architectures that need to be more plug and play.
Note
It is recommended that you unplug the cable from the interface prior to making changes to the interface.
Via Command Line
Command
nmcli con modify [interface_name] ipv4.method auto ipv4.addresses ""
Example
with interface name eth0
username@ubuntu:~$ nmcli con modify eth0 ipv4.method auto ipv4.addresses ""
Response
 blank

 Note: However you can verify the change has been made with the ``ip addr`` command.
       There will be no ``inet`` line for the interface ``eth0`` until you plug in a cable
       to a device that has a DHCP server to provide an IPv4 address the interface

1: lo: <LOOPBACK,UP,LOWER_UP> mtu 65536 qdisc noqueue state UNKNOWN group
   default qlen 1000
   link/loopback 00:00:00:00:00:00 brd 00:00:00:00:00:00
   inet 127.0.0.1/8 scope host lo
   valid_lft forever preferred_lft forever
   inet6 ::1/128 scope host
   valid_lft forever preferred_lft forever
2: eth0: <BROADCAST,MULTICAST,UP,LOWER_UP> mtu 1500 qdisc fq_codel state UP group
   default qlen 1000
   link/ether 00:0c:29:2b:cc:48 brd ff:ff:ff:ff:ff:ff
   inet6 fe80::be9f:d2a4:4451:3dfe/64 scope link noprefixroute
   valid_lft forever preferred_lft forever
3: wlan0: <BROADCAST,MULTICAST,UP,LOWER_UP> mtu 1500 qdisc fq_codel state UP group
   default qlen 1000
   link/ether 00:50:56:28:7a:8a brd ff:ff:ff:ff:ff:ff
   inet 172.16.79.232/24 brd 172.16.79.255 scope global wlan0
   valid_lft forever preferred_lft forever
   inet6 fe80::250:56ff:fe28:7a8a/64 scope link
   valid_lft forever preferred_lft forever
- Via GUI
The image below illustrates how to set the interface to
Automatic (DHCP)mode using the graphical user interface.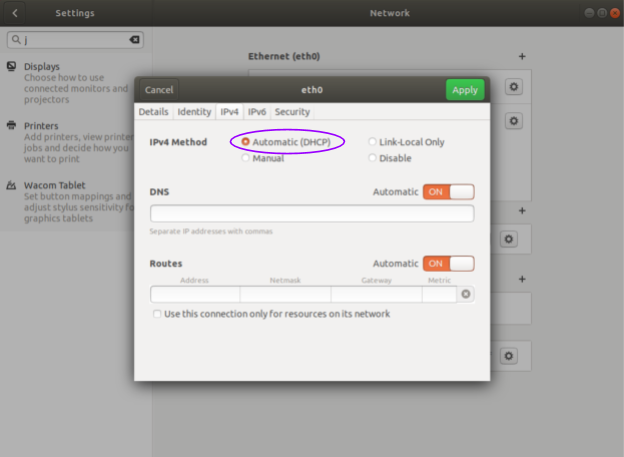
Setting the Host Interface to Static IP
Use this to set your interface to be assigned a static IPv4 address. This is useful for controlling the IP address that the sensor will be sending data to.
Note
It is recommended that you unplug the cable from the interface prior to making changes to the interface.
Via Command Line
Command
nmcli con modify [interface_name] ipv4.method manual ipv4.addresses [ip_address]
Example
with interface name eth0 and IPv4 address 192.0.2.1/24.
username@ubuntu:~$ nmcli con modify eth0 ipv4.method manual ipv4.addresses 192.0.2.1/24
Note
The /24 is shorthand for Subnet Mask = 255.255.255.0
Response
blank

Note: However you can verify the change has been made with the ``ip addr`` command.
      The ``inet`` line for the interface ``eth0`` will show the static IPv4 address. e.g. ``192.0.2.1``

   1: lo: <LOOPBACK,UP,LOWER_UP> mtu 65536 qdisc noqueue state UNKNOWN group
          default qlen 1000
       link/loopback 00:00:00:00:00:00 brd 00:00:00:00:00:00
       inet 127.0.0.1/8 scope host lo
          valid_lft forever preferred_lft forever
       inet6 ::1/128 scope host
          valid_lft forever preferred_lft forever
   2: eth0: <BROADCAST,MULTICAST,UP,LOWER_UP> mtu 1500 qdisc fq_codel state UP group
          default qlen 1000
       link/ether 00:0c:29:2b:cc:48 brd ff:ff:ff:ff:ff:ff
       inet 192.0.2.1/24 brd 192.0.2.255 scope global noprefixroute eth0
          valid_lft forever preferred_lft forever
       inet6 fe80::be9f:d2a4:4451:3dfe/64 scope link noprefixroute
          valid_lft forever preferred_lft forever
   3: wlan0: <BROADCAST,MULTICAST,UP,LOWER_UP> mtu 1500 qdisc fq_codel state UP group
          default qlen 1000
       link/ether 00:50:56:28:7a:8a brd ff:ff:ff:ff:ff:ff
       inet 172.16.79.232/24 brd 172.16.79.255 scope global wlan0
          valid_lft forever preferred_lft forever
       inet6 fe80::250:56ff:fe28:7a8a/64 scope link
          valid_lft forever preferred_lft forever
- Via GUI
The image below illustrates how to set the interface to
Manual (static)mode using the graphical user interface.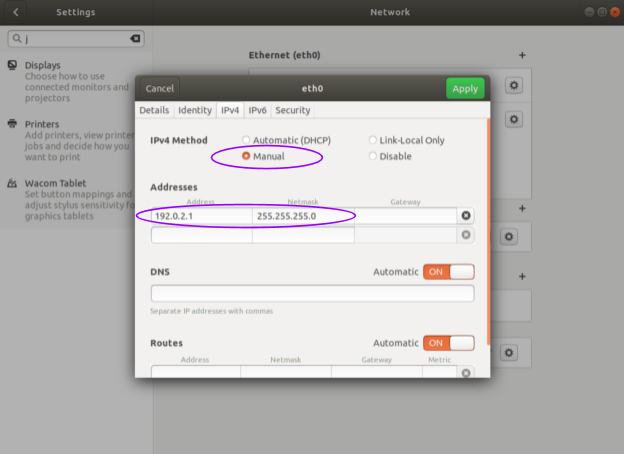
Finding a Sensor with mDNS Service Discovery
The sensor announces its presence on the network using Multicast Domain Name Service (mDNS) with a service type named _roger._tcp. You can use service discovery tools such as avahi-browse (Linux) to find all sensors connected to the network.
Find all sensors and their associated service text which includes the sensor IPv4 address using
avahi-browseand the sensor service type_roger._tcp.
Command
avahi-browse -lrt [service type]
Example
username@ubuntu:~$ avahi-browse -lrt _roger._tcp
Response
+   eth0 IPv6 Ouster Sensor |sn|                    _roger._tcp          local
+   eth0 IPv4 Ouster Sensor |sn|                    _roger._tcp         local
=   eth0 IPv6 Ouster Sensor |sn|                    _roger._tcp          local
   hostname = [|os-sn|]
   address = [fe80::be0f:a7ff:fe00:1852]
   port = [7501]
   txt = ["fw=ousteros-image-prod-aries-v2.0.0-20200417193957" "sn=99201000067
8" "pn=840-102145-B"]
=   eth0 IPv4 Ouster Sensor |sn|                    _roger._tcp          local
   hostname = [|os-sn|]
   address = []
   port = [7501]
   txt = ["fw=ousteros-image-prod-aries-v2.0.0-20200417193957" "sn= |sn|"
          "pn=840-102145-B"]
Note
In this example, your sensor IPv4 address is determined to be 169.254.0.123.